APP INVENTOR
EXAMPLE 8: TIMER
The following tutorial will show how to set a timer in your app. The label is going to show the time passing. In addition, when the timer gets to 5, the screen background colour will change and when it gets to 10, a new screen will open.
DESIGNER SECTION
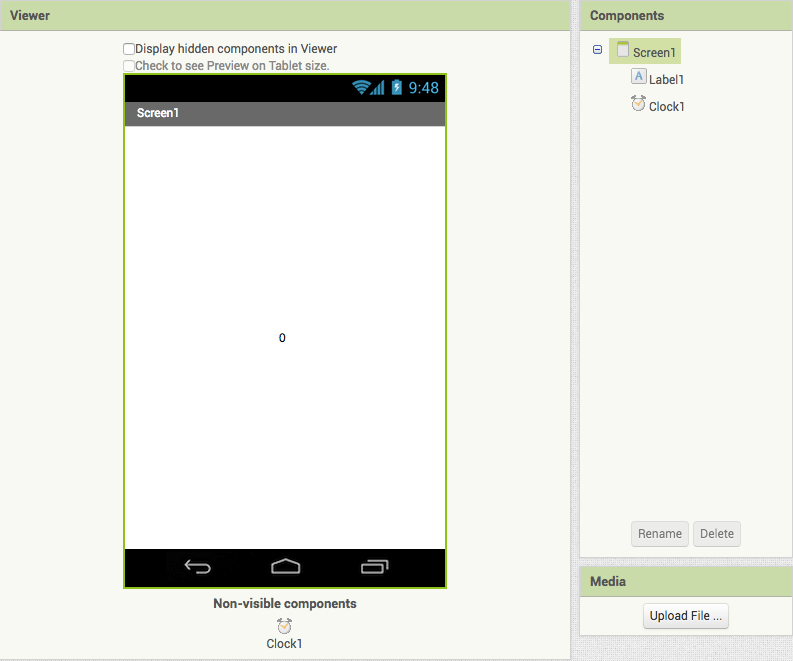
1. Add a Label to your Screen and change its text to “0”
2. Change the alignment options of the screen to “center” so that the label will be displayed right in the centre of the screen
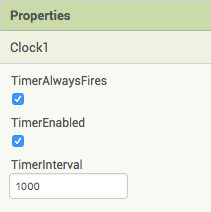
3. Go to Sensors section and add a Clock. As you can see, this object is included as non-visible component. Check its properties: TimerInterval should be set to 1000 and both boxes should be ticked.
4. Click on “Add Screen” on top of the viewer to add Screen2.
BLOCKS SECTION
1. The first thing to do is adding the code for the clock, that is when the clock starts to count, we want the label to display the time passing. So, we need to click on “Clock” and add:
when Clock1.Timer
do
2. As we said above, the label must mirror the time passing so we need to include the block of code which makes the label change according to the seconds. Click on label and add:
set Label1.Text to Then click on Math and attach the block for sum to the previous code. In the first empty space, drag “Label1.Text”, which is included in the Label section. In the second empty space instead, add the block “0” you find in Math and change it to 1.
In this way, the label text will change according to the timer and it sets to increase by one every second.
3. Now we want to change the screen background colour to red when the timer gets to 5. We need an if statement to insert our condition. Go to Control and add the “if then” block. Then click on the setting icon and choose “else”.
Let’s add the first condition. Click on Math and attach the block “…. = …..” to the if clause. In the first empty space, attach “Label1.Text” that you find clicking on Label. In the second space, include our boundary to set the background colour to red, that is time must be on 5 seconds. Add the “0” block from Math and change its value to 5.
Now, we just need to add the statement after “then”. Go to Screen1 and drag:
set Screen1.BackgroundColor to Go to colours and attach the red label to it.
4. What was the second condition? When the timer gets to 10 seconds, we want to open a second screen. So, let’s add the blocks for the “else” clause. Just copy and paste the block you attached to the if clause and set the number to 10. Then, click on Control and add the block:
open another screen screenName As its name is a string, drag an empty block from Text and write the name “Screen2”.
5. Finally, we just need to set the background colour for the second screen to white. Go to Screen2, click on it in the left side menu and add:
when Scree2.Initialise
do
Then, always from Screen2 section, add:
set Screen2. BackgroundColor to Now you just need to click on Colors and add the white label.
Now run your app with Emulator!
You can download the project here.


