APP INVENTOR TUTORIAL
App Inventor is an open-source programming environment which allows beginner coders to build their own fully functional apps for Android Operating System.
It is composed of a “designer” section where you visually design your app layout and a “blocks” sections where you include the code to run your app.
To use this program, you just need a gmail address. Then click here and click on “Create apps!” on the top to log in.
APP INVENTOR CONTROLS
DESIGNER
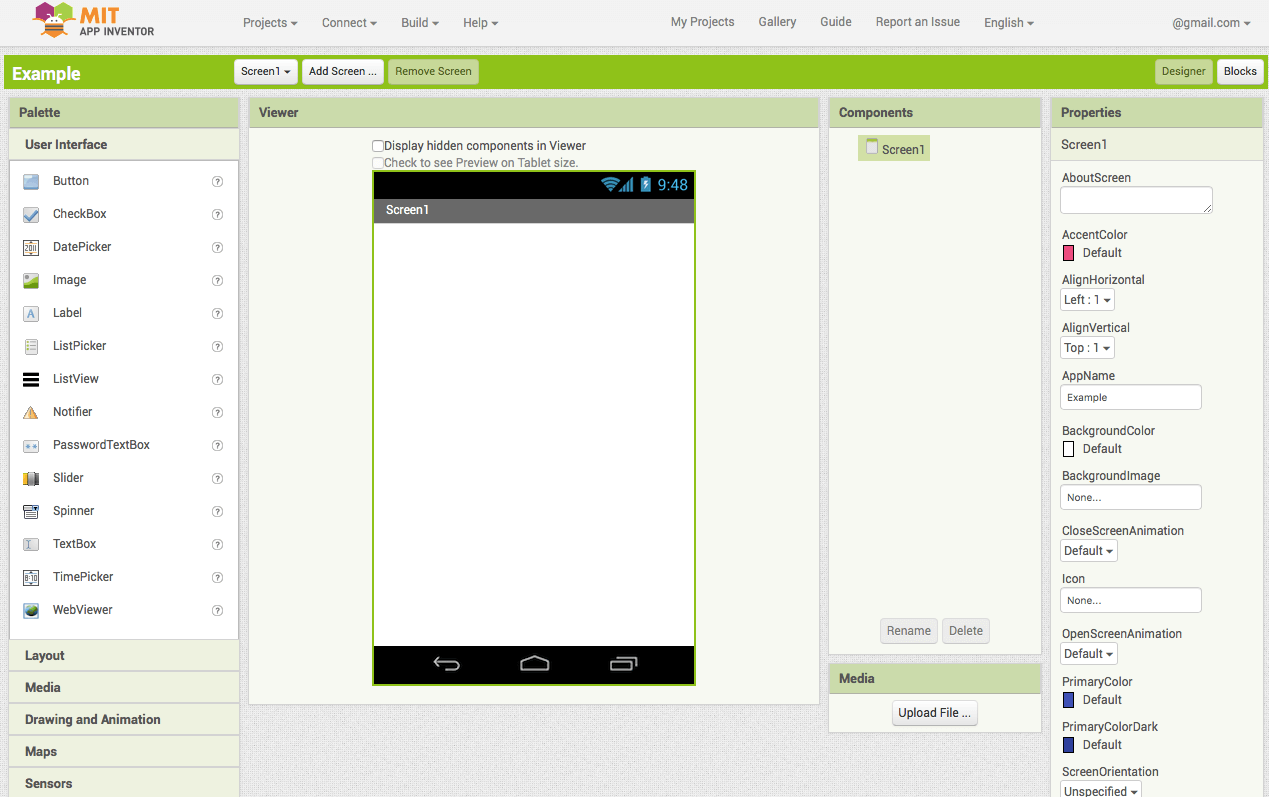
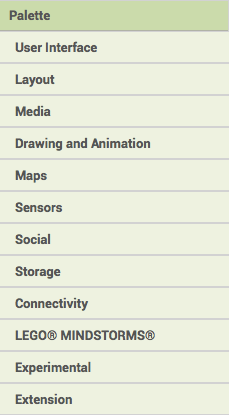
- The first section called Palette includes all the objects and layout options you can choose and drag onto the screen, that is media, buttons, text labels, images, timer, etc.
- The central is the Viewer, that is the visual rendering of your phone screen. Close to the screen, you can see the Components window, where you will see all the objects you added to your screen. In the beginning, you will see just “Screen 1”.
- The last section on the left, Properties, regards all the options you can choose to change the attributes of the object you have included in your screen. For example, here are the options for changing your Screen1 attributes like background colour, background image, title, alignment.
EXAMPLE 1: CHANGING BUTTON BACKGROUND COLOUR AND TEXT LABEL
First of all, create a new project by clicking on Projects Menu on the top right bar and choose “Start a new project”. Name it “Example1”.
N.b. App Inventor does not accept spaces between words, so always name your projects using capital letters for each new word (for example: ThisIsANewProject).
- From Palette, click on Layout and drag an HorizontalArrangement onto your screen. The orientation of the Arrangement tells you how the objects are going to be added on your screen: if it is horizontal, they will be added one next to each other; if it is vertical, they will be displayed one beneath each other.
- Check the Arrangement properties by clicking on Horizontal Arrangement in the Components section. To make your arrangement as large as the screen, change the width by clicking on the Width option and select “Fill parent”. For the height instead, customise it to 20 percent.
- To centre all the elements you are going to add to the HorizontalArrangement, change AlignHorizontal and AlignVertical to “Center”.
4. Add a Button from the User Interface section to the HorizontalArrangement and change its name in “Change text label” by modifying the section “Text”.
5. As we want to have also a text label, we will first add a new HorizontalArrangement, then drag a Label from the User Interface. Check the alignment option of the arrangement and change them to “center”.
6. Now we are going to include the code to make the label change when the user clicks the “Change text label” button. Let’s switch to the programming section by clicking on “Blocks” on the top left side.
The Blocks section allows you to drag the pieces of codes you need to make your app. The menu is divided by type of code block, as you can see in the image here on the right.
According to which object the code you are going to insert is referring to, you have to click on the right object and then drag the code blocks into the white screen.
7. First of all, we want to make something happen when the button is clicked by the user. So, we have to click on Button and add the code block:
when Button1.Click
do
8. What is going to happen when the Button is clicked? We want to change the background colour and change the text of the label. So, let’s go to Label and Button and add the following code blocks respectively:
set Label1.Text to

set Button.BackgroundColor.to
9. The last step is specifying what text and colour we want to have after clicking. Click on “Text” section of the blocks and add the first empty code block ” “. Attach the code block to the “set Label1.text.to” and type the new text is going to appear after clicking the button, that is “Hello!”
To change the button background to blue, go to Colors, drag and attach the blue code block to the “set.Button1.BackgroundColor.to” block.
10. Now your block code is ready. Run your app by clicking on Connect Menu and choose Emulator. Wait some seconds and see your app running directly onscreen.
You can download the project here.


